Home weather net
There is a followup of this post.
When I purchased Raspberry Pi starter kit couple of years ago, I got the DS18B20 sensor with it. It is a simple device, three pins only, uses one-wire protocol to send the measured temperature to the host computer. There are plenty of tutorials how to use it with the Raspberry Pi.
When I purchased Raspberry Pi starter kit couple of years ago, I got the DS18B20 sensor with it. It is a simple device, three pins only, uses one-wire protocol to send the measured temperature to the host computer. There are plenty of tutorials how to use it with the Raspberry Pi.
I have connected that one sensor to the PI and was able to read the
temperature.
Then I have purchased more DS18B20 sensors and placed one outside, in the shadow.
Then I have purchased more DS18B20 sensors and placed one outside, in the shadow.
Then I have purchased DHT11 combined sensor for both temperature and
humidity.
DHT11 sensor has a nice support for Python in this library.
Now I have four sensors, two for the inside temperature, one for the outside temperature, and one for the inside humidity. The next step was to make some web site for temperature reading. I have created a small web server which gathers data from all four sensors and displays it in two ways: gauges and charts:
This is nice, but I wanted an instant readout of the temperature, without a
need for grabbing the nearest mobile phone, tablet, or computer and navigating to the web server. Then I
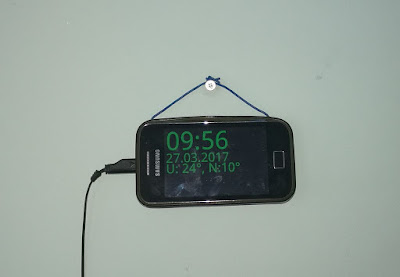
remembered that I have two old Samsung Android phones: Samsung Galaxy Ace and Samsung Galaxy S+. Both have
old Andorid OS, v2.3.6. Both have so small amount of RAM, that they are useless now (especially the Galaxy
Ace). So, I have uninstalled everything and installed my own custom application, so those phones now have a
new purpose:
Whenever I look at them, they display the time, date, and the temperature
inside and outside. The data is displayed each second, moved to the right by one pixel, and then at the end
of the line, moved by one pixel below, so the pixels are not burned.
Android phone runs without battery
Now I had two questions: will the display live, since I have turned off the
screen saver, and what about the battery - can I run the mobile phone without a battery?
Well, the first question can be answered only by the experiment, and both
phones now work for approximately half a year, and they still work.
The second question is more interesting: if I remove the battery, the phone
will not work. Android is designed to work with the battery, and it needs software patches at very low level
to turn off the protection which requires the battery to be present.
Now, there are plenty of tutorials how to make your Android phone work without
a battery. Those tutorials work for older devices like these I have. It all comes to one thing: pretend that
you do have a battery. How to do that? Here is what I have done.
First of all, the procedure differes for various phones. Even my two phones
have different procedure. For the Galaxy Ace, it was the simple one. There are three pins inside the phone
to which battery contacts connect when you insert the battery.
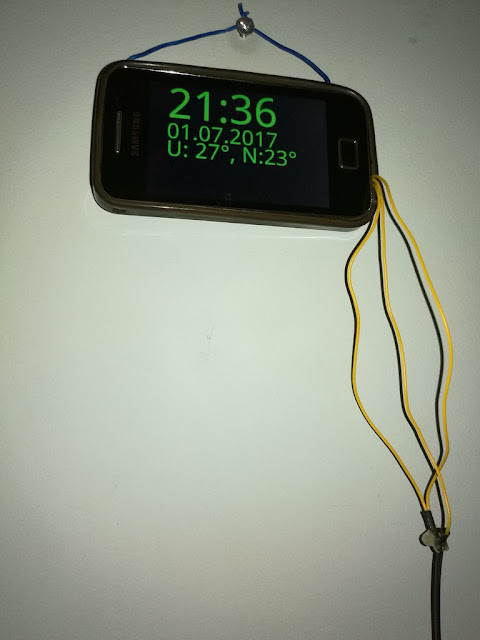
You can connect 5V (from the charger) to the plus pin, ground to the minus
pin, and, for the Galaxy Ace, I simply shorted the 'B' pin to the minus pin. The battery voltage is 3.7V,
but the phone works with 5V, too.
The picture above is the Galaxy Ace. No voltage regulators, and no resistors.
With the Galaxy S+, it was a different
story. First of all, 5V and ground from the charger can be connected to the plus and minus pins, but the
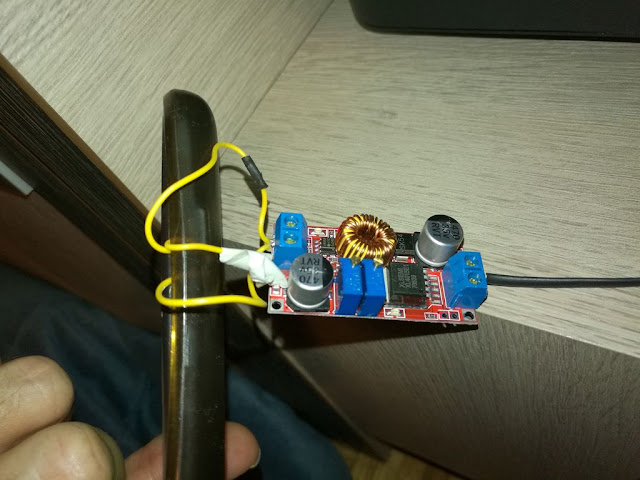
phone does not work reliably. I needed to step down the voltage. I have purchased a buck step down
regulator, and lowered the voltage to 3.9V. Then I have tried various resistors between minus pin and
'B' pin, to find out that 10K Ohm resistor works nice. So, my final configuration includes voltage
regulator to step down the voltage, and 10K resistor between 'B' and minus pins:
The picture above is the voltage regulator and the Galaxy S+. The resistor
cannot be seen here, since it is placed inside the phone.


Comments
Comments powered by Disqus